
Introduction:
In this guide, we'll explore the straightforward process of scheduling automatic shutdowns in Windows 11. Automatic shutdown is a handy feature that not only enhances the safety and security of your computer but also contributes to the longevity of your operating system. Join us as we navigate through the steps to set up this convenient functionality, ensuring your system shuts down correctly every time, thereby extending its lifespan. Let's dive in and simplify your computing experience with Windows 11.

Why Need a Schedule Shutdown?
When you work late at night on your computer, it can be hard to remember to turn it off; In such cases, you should use the computer's automatic shutdown schedule.
Also Scheduling regular shutdowns offers several advantages:
Software Updates: Most of us face a common problem with Windows 11; i.e., abrupt shutdown due to updates. Scheduling a shutdown will save us from losing our work.
Energy Conservation: Reduce power consumption during idle periods, contributing to lower electricity bills and environmental sustainability.
System Maintenance: Allow your computer to rest and perform essential maintenance tasks, such as clearing temporary files and refreshing system resources.
Security: Minimize the risk of unauthorized access by powering down your system when not in use.
Method-1: Auto Shutdown Via Using Run Command (Windows+R)
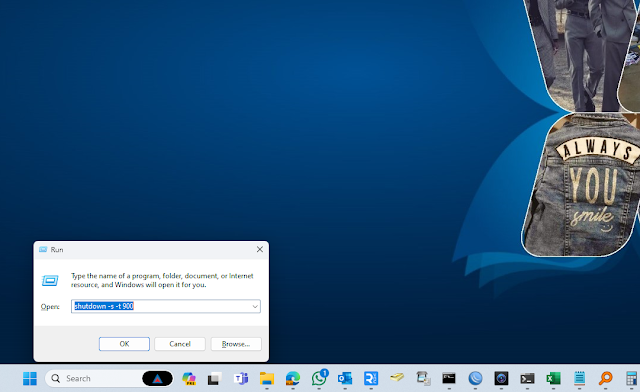
Step-1. From the Start menu, open the Run dialog box or you can Press the "Window + R" key to open the Run window.
Step-2. Type "shutdown -s -t <number in seconds>" and press Enter Key.
Note: If you want to shut down your PC/laptop after 15 minutes then, type: shutdown -s -t 900
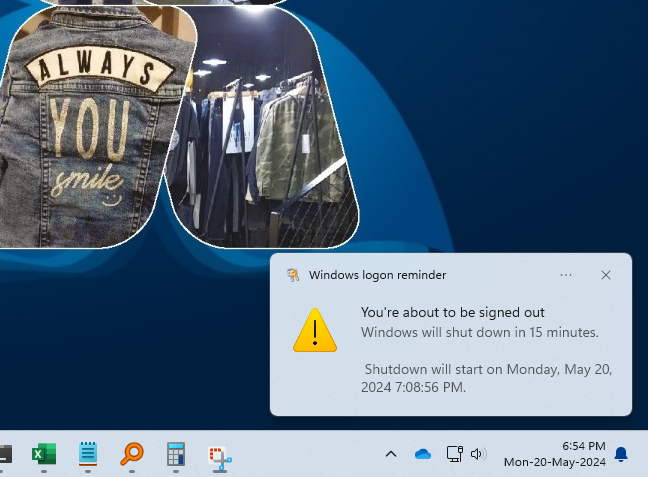
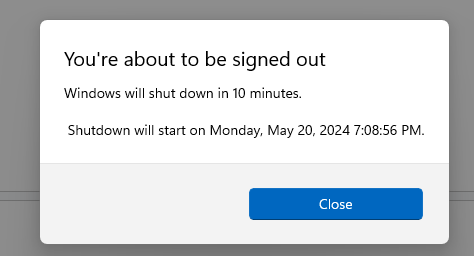
After you finish this setting, the system will prompt you about the auto-shutdown time, as seen in the image below.
Method-2: Auto Shutdown via Using Command Prompt
Step-1. Open Command Prompt. (Window + R
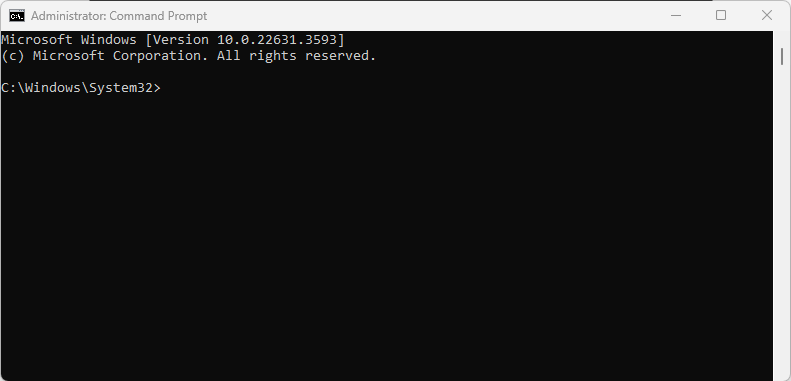
Step-2. Type "shutdown -s -t <number in seconds>" and press enter key.
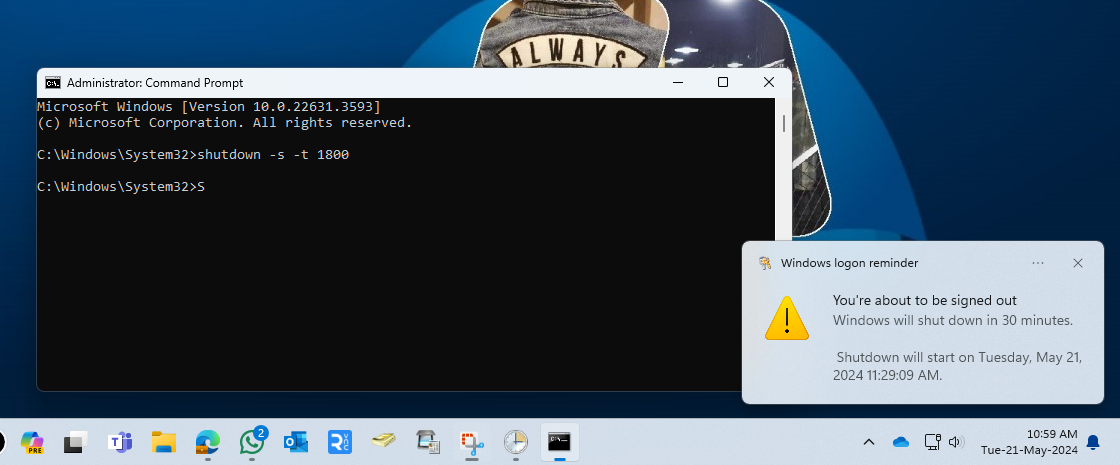
Example, if you want to shut down your PC/laptop after 30 minutes then, type: shutdown -s -t 1800
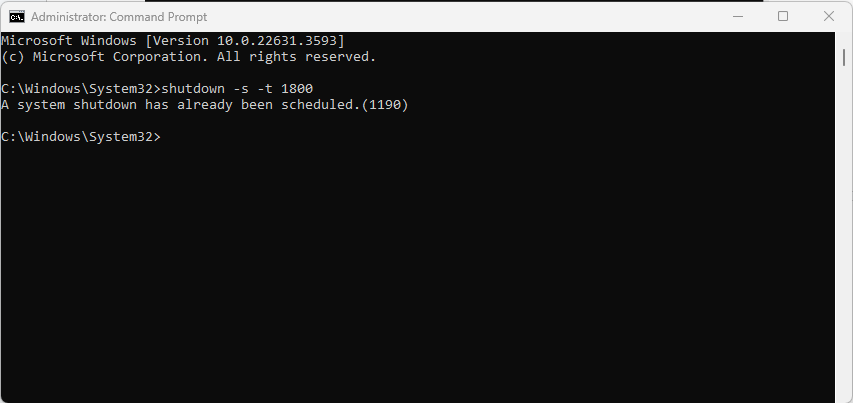
In this case, 1800 denotes the number of seconds, therefore your machine will shut down automatically after 30 minutes. You may also experiment with other settings to find the one that works best for you.
Following completion of this setting, the system will prompt you about the auto-shutdown time, as seen in the image below.
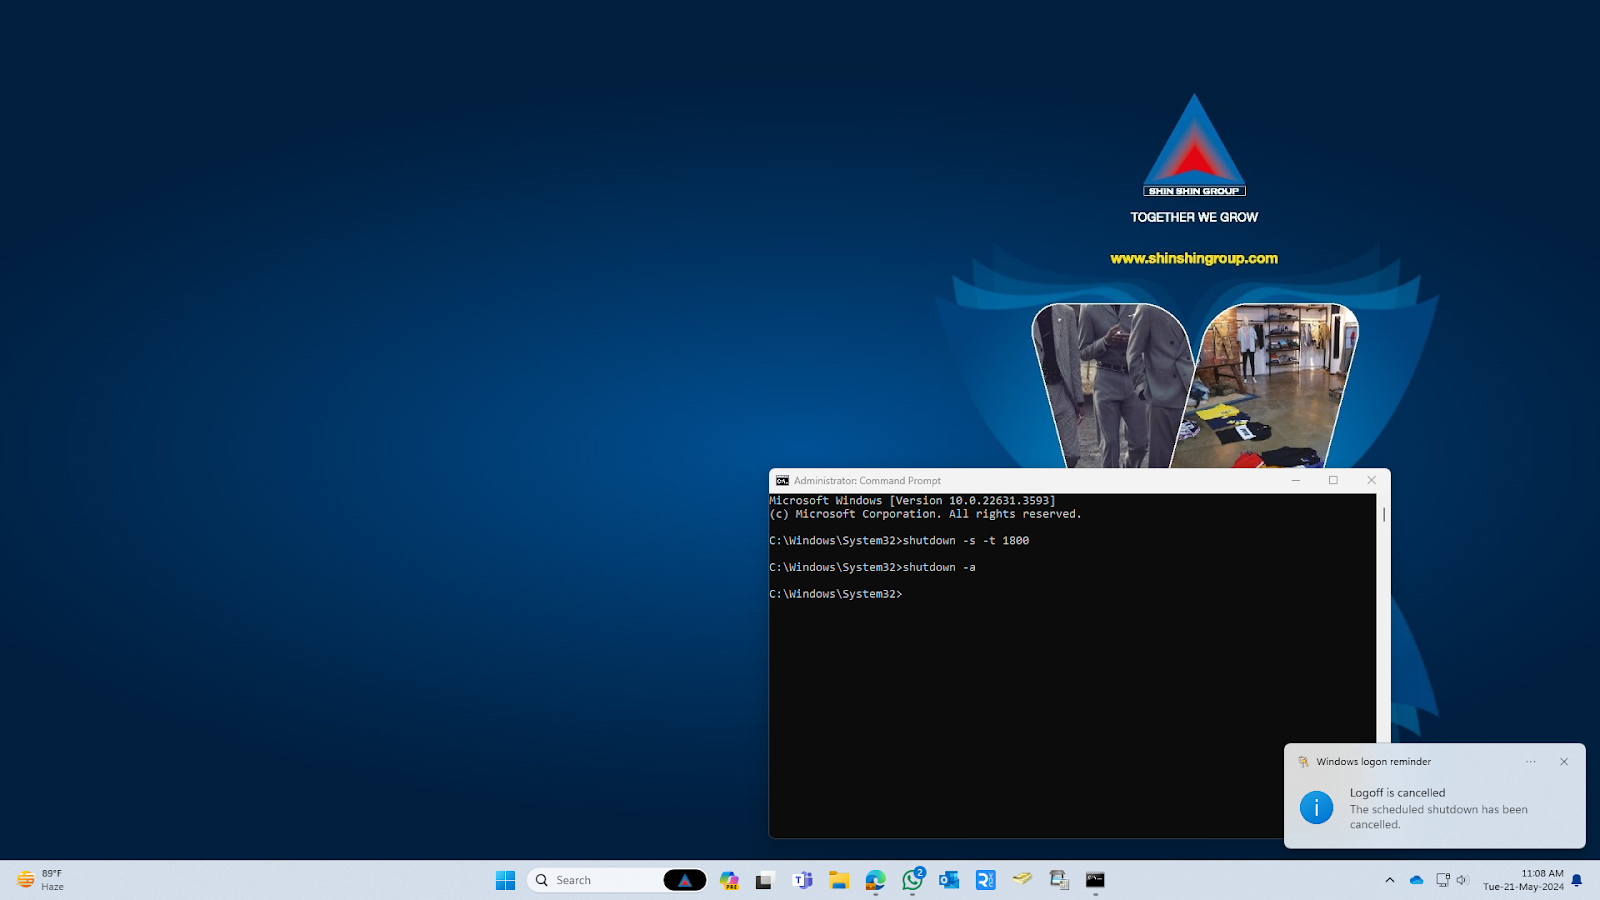
Enter the following command: shutdown -a This command will cancel the scheduled shutdown for one time. You'll have to repeat this process if you want to cancel other scheduled shutdowns
Method-3: Auto Shutdown via Using Task Scheduler
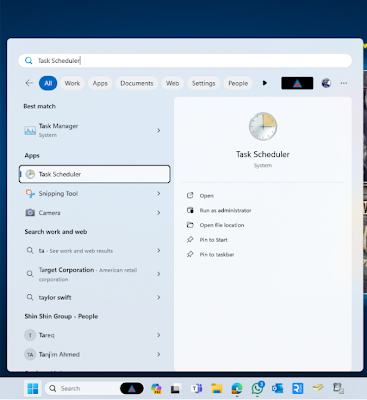
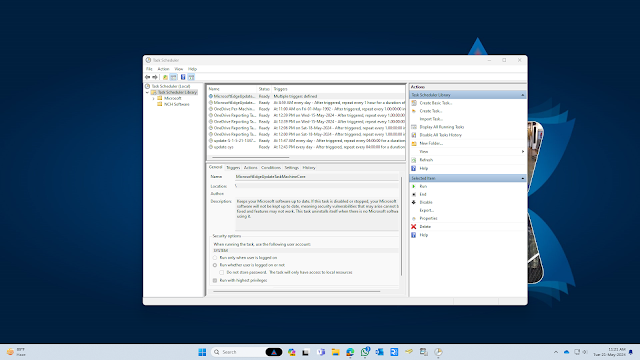
Step-01: Open Start, Search for Task Scheduler, and press "enter" to open Task Scheduler.
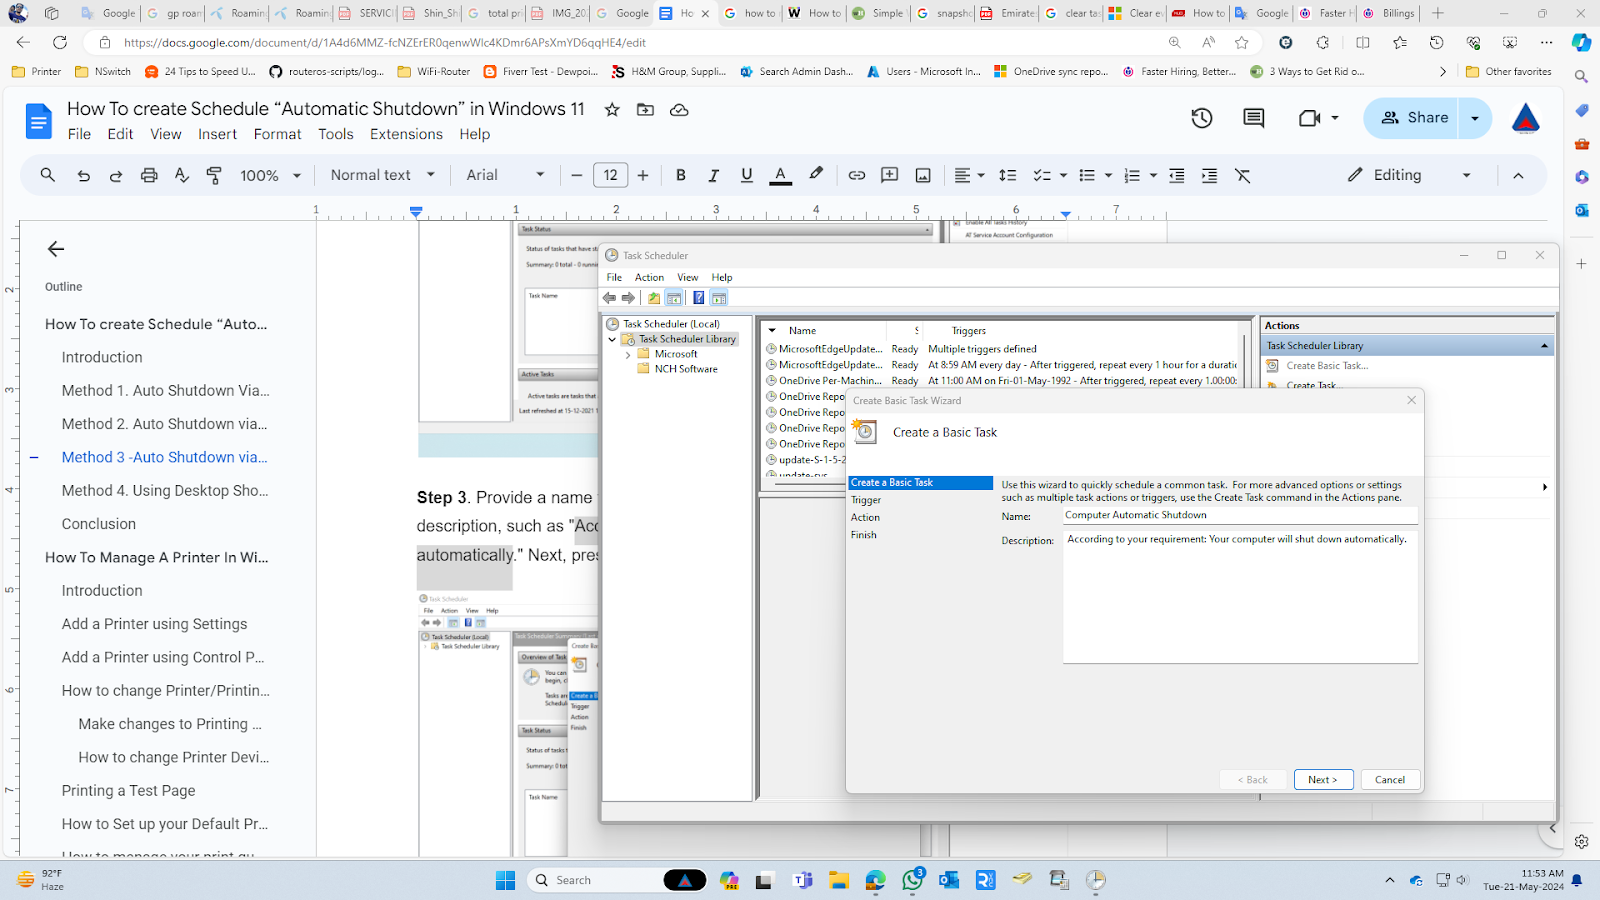
Step-02. Click on the "Create Basic Task" option.
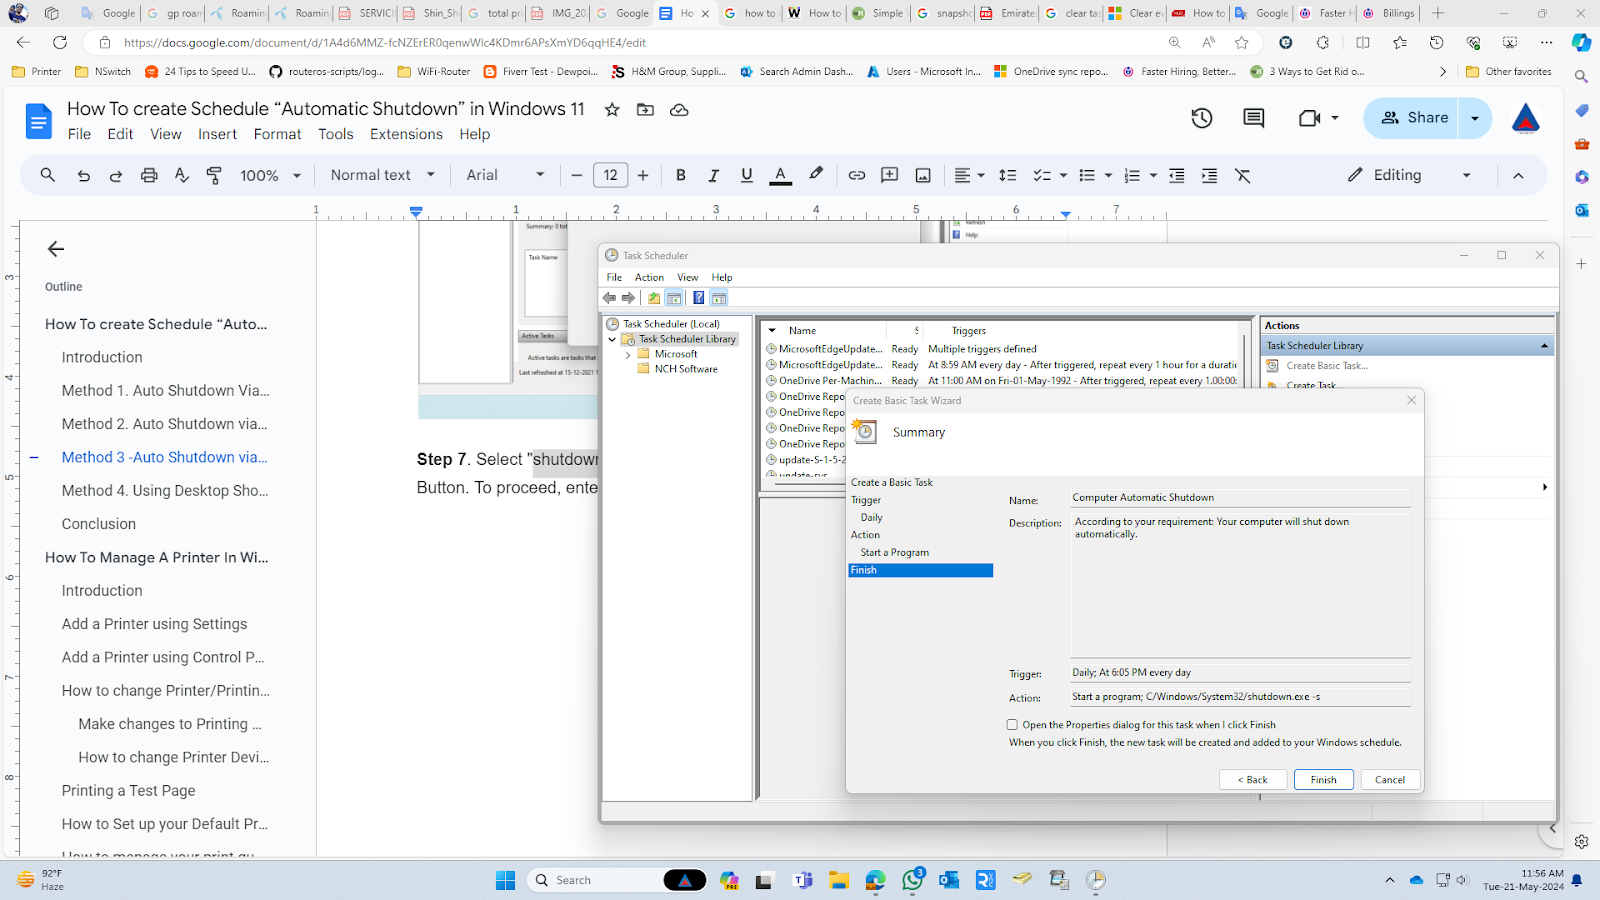
Step-03. Provide a name for the task, such as "Computer Automatic Shutdown", and a description, such as "According to your requirement: Your computer will shut down automatically." Next, press the enter key.
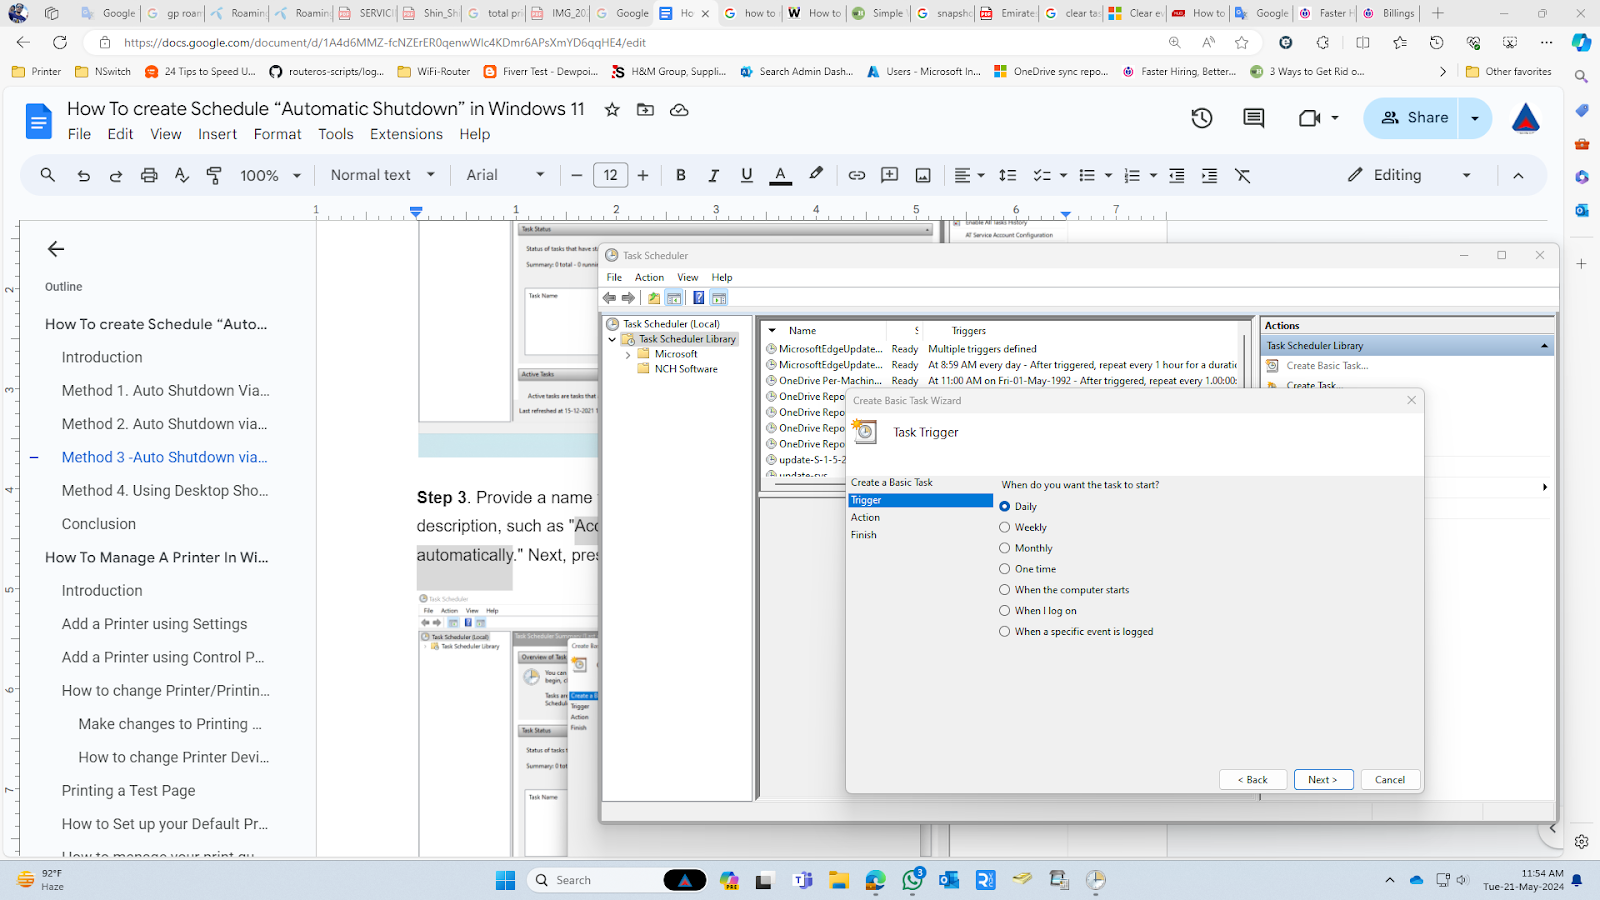
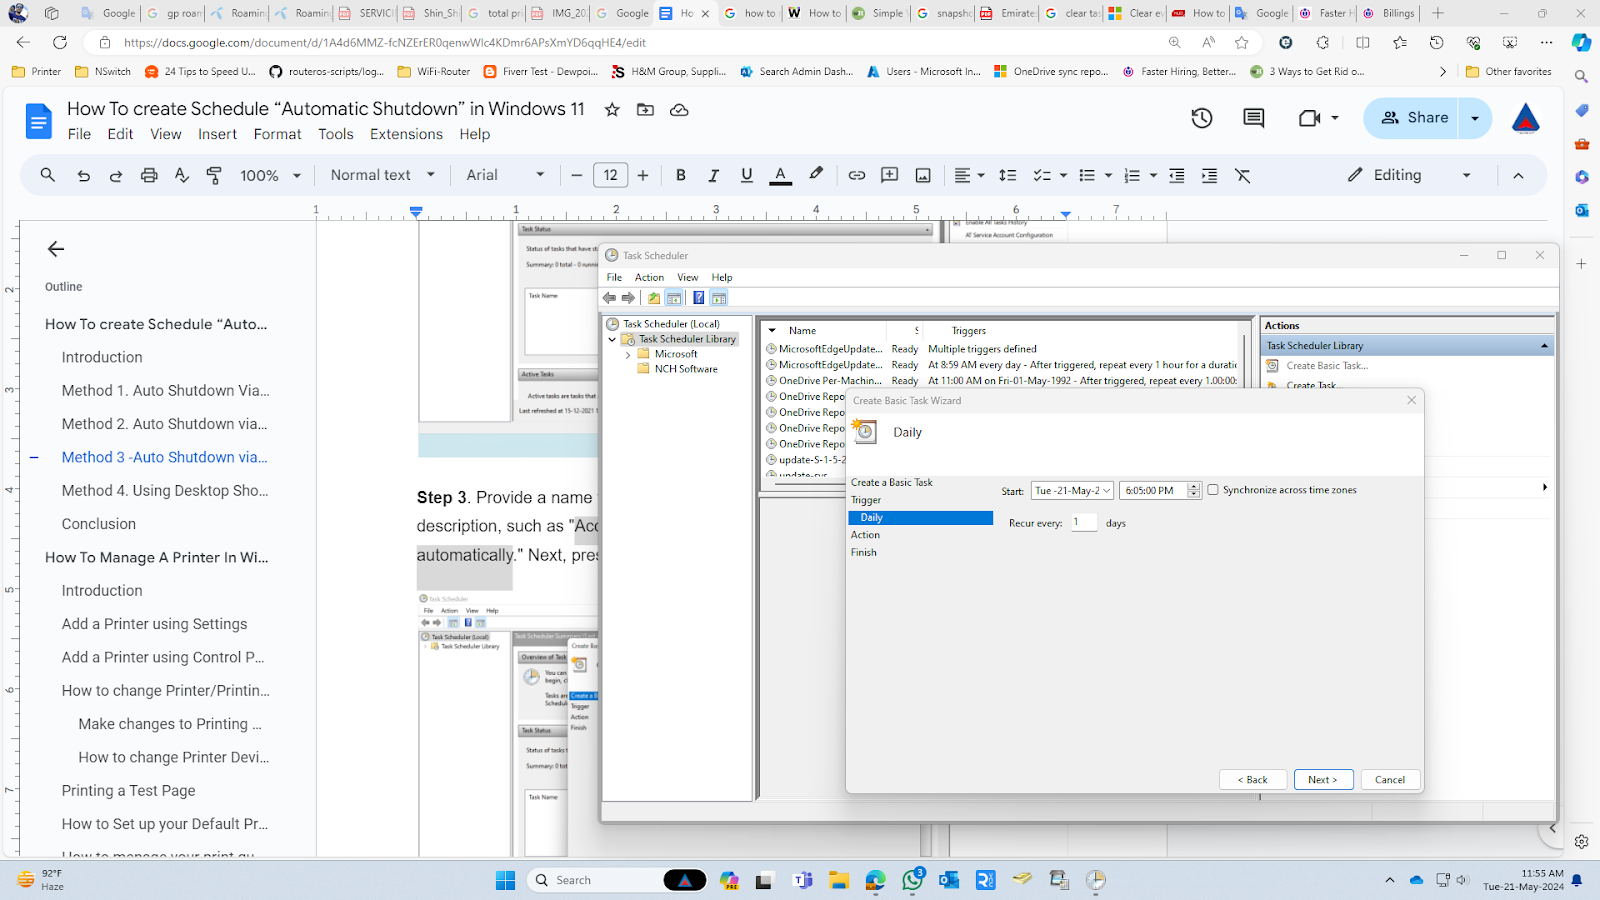
Step-04. Choose when you want your job to begin; simply, you need to tell the scheduler how frequently you want the activity to occur. Click Next.
Step-05. Set the Start date & time of the task. Click Next.
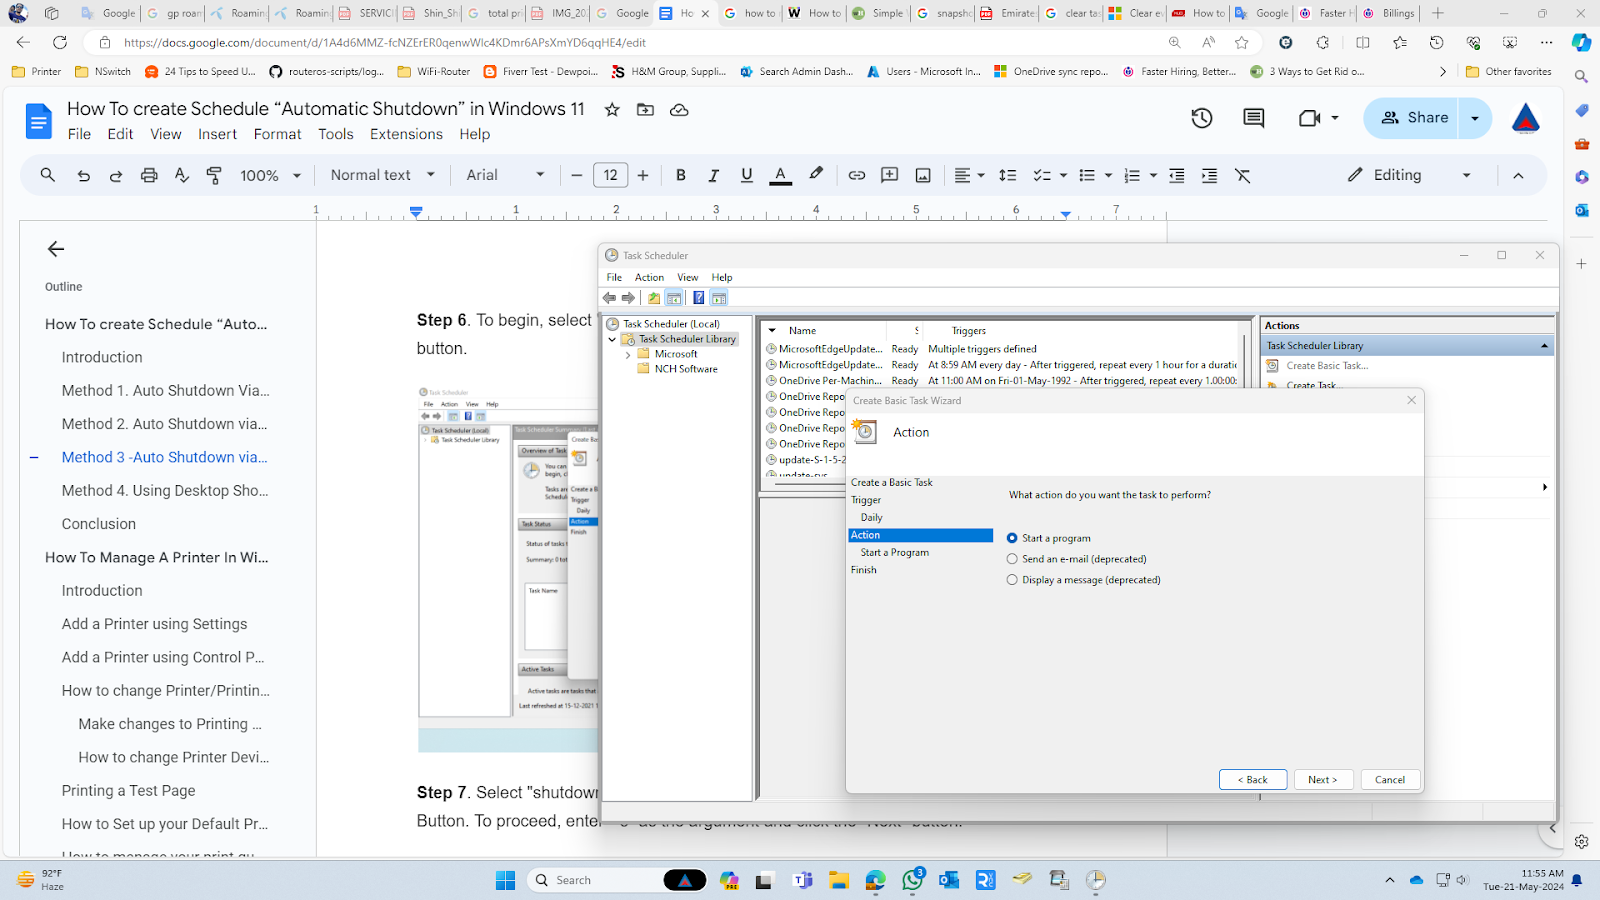
Step-06. To begin, select "Start a program" from a list of actions and then click the "Next" button
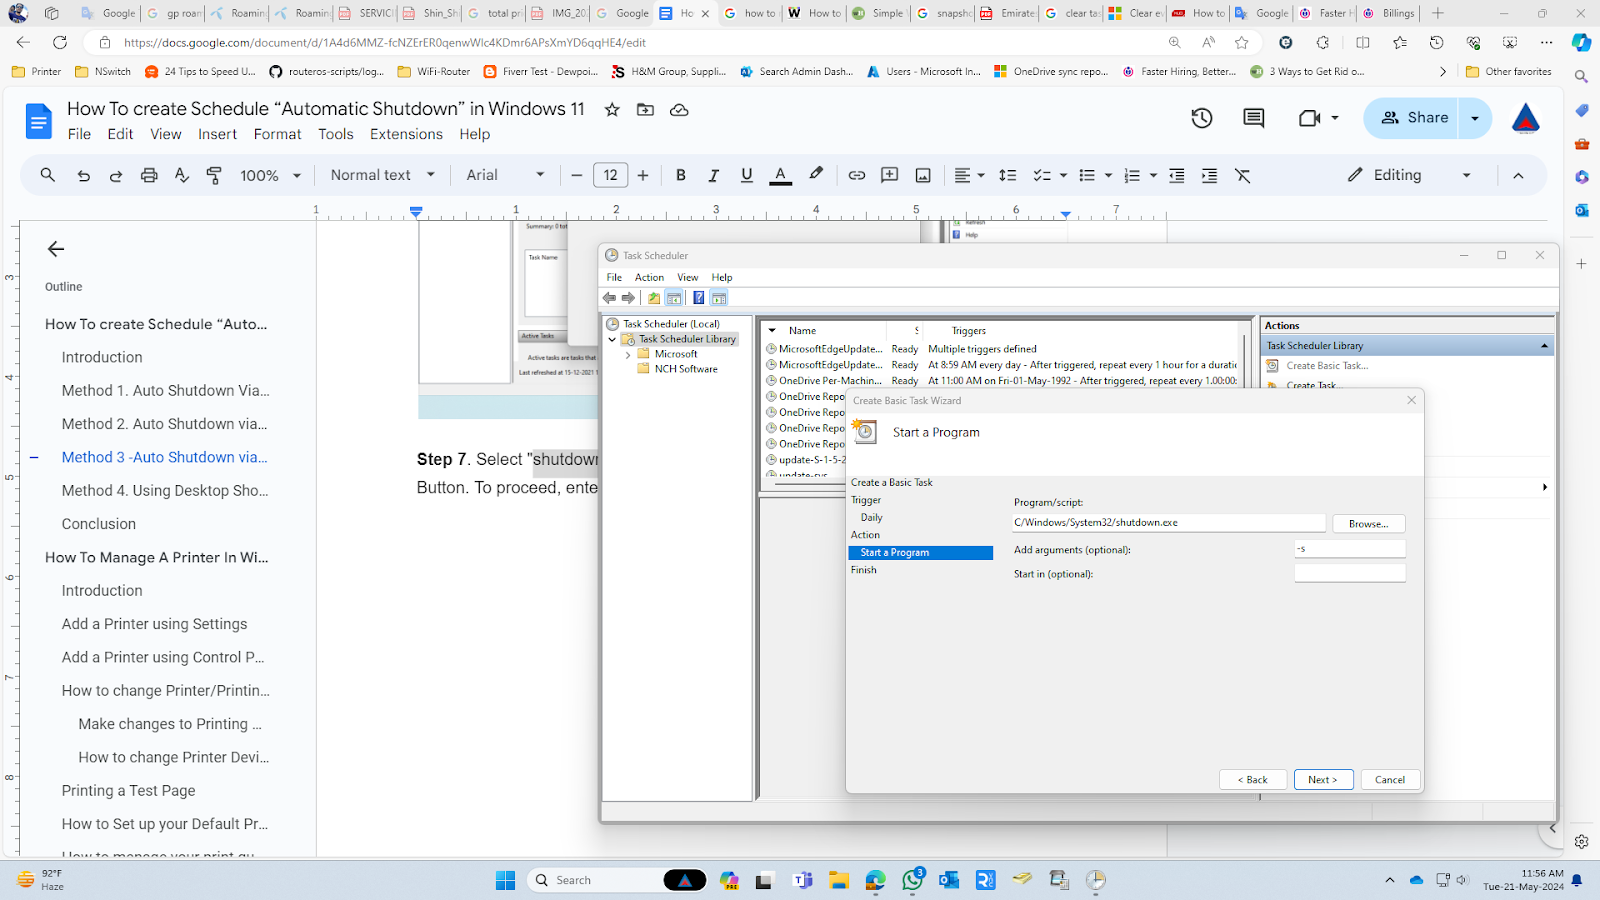
Step-07. Select "shutdown.exe" from C/Windows/System32\ by clicking the Browse Button. To proceed, enter "-s" as the argument and click the "Next" button.
Step-08. Click the "Finish" button to complete the task.
Method-4: Using Desktop Shortcut
Step 1. Right-click any empty place on the Desktop to bring up a tiny box. It has a lot of options. Simply drag the cursor to New and then click Shortcut.
Step 2. A popup will appear with the question "What item would you like to create a shortcut for?" As a response, type "C:\Windows\System32\Shutdown.exe"

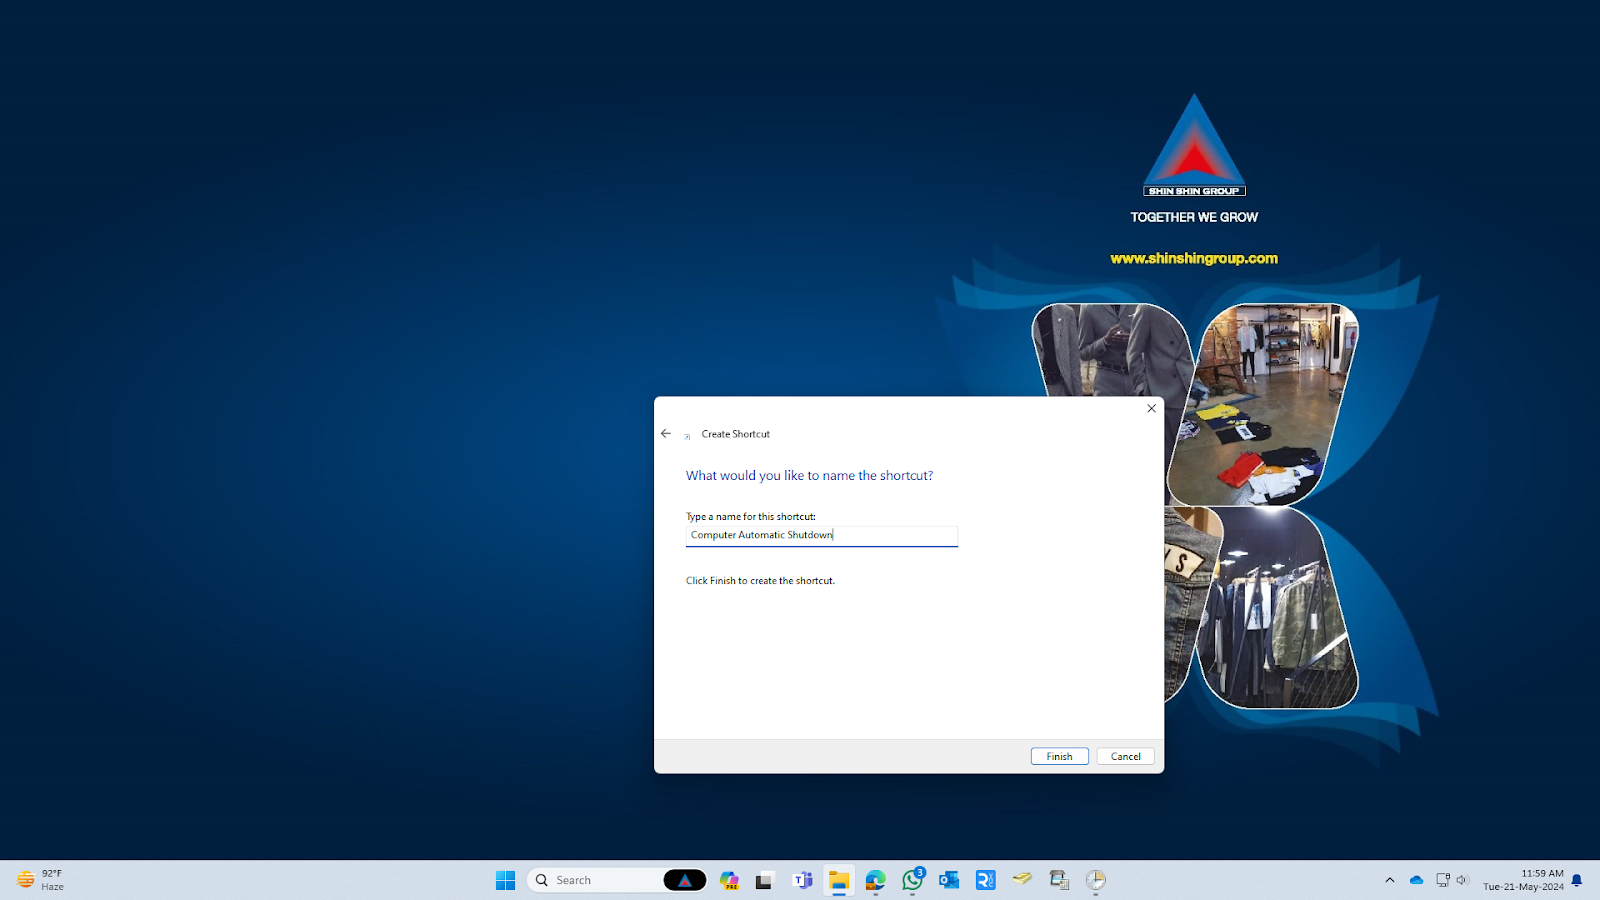
Step 3. Click Next. Windows will give you one more question concerning the name of this shortcut, to which you may type whatever you like, and then click Finish.
Step 4. A new shortcut will appear on your Desktop. Select Properties by right-clicking on it. There will be a box visible. Fill in the blanks: At the Target input box, type -s -t 2700 -c "Operation was successful."
"Operation was successful" is the text that will show up, when the task is completed.

You may replace "2700" with any time period you desire (measured in seconds) and "Operation was successful" with whatever text you want to display. Then press OK.
Conclusion:
In this article, we discussed different methods to schedule automatic shutdown in Windows 11. Automating shutdowns in Windows 11 streamlines your workflow and enhances efficiency. With Task Scheduler, you can create tailored shutdown tasks to suit your needs. This not only saves energy and reduces costs but also improves system performance. Customize your shutdown schedule, explore advanced options, and optimize your computing experience. Take control of your computer's downtime and enjoy a more productive environment.